
Lumion exterior rendering tutorial — Watch and Practice
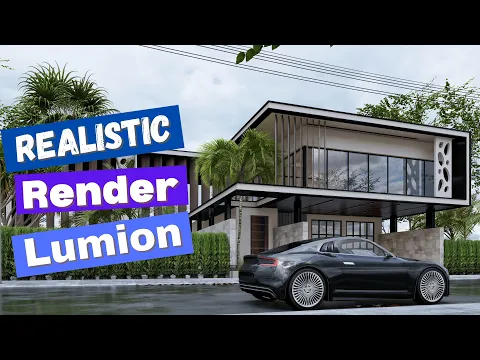
Follow Nice Tower’s exterior lesson in Lumion Pro 12.5 and use the original video as a reference while testing your own architectural scene. Focus on the relationship between model preparation, materials, lighting and the final camera view. This watch page keeps the lesson prominent and provides a short practice plan to help you turn a viewed example into a repeatable rendering exercise.
Lumion exterior rendering tutorial: 4 steps to practice
1. Prepare an exterior scene
Start with a small building or a manageable part of your project. Check the imported model for missing faces, misplaced objects and inconsistent material assignments before adding scene detail. Inspect the entrance, roof edges and foreground at the camera angle you intend to use. Problems that are hard to notice in a distant view often become obvious once you frame the final presentation.
2. Compare lighting and materials
Keep a reference preview before changing the lighting. Work on the main facade, glass and ground surfaces separately, then compare their combined effect. The aim is to make the architecture readable rather than to maximize every reflection or effect. When following the video, pause after a visible change and compare the result with your own building and environment.
3. Choose a convincing camera
A useful architectural view explains the building’s proportions and its relationship to the site. Compare a closer view with a wider composition before refining small decorative objects. Watch where the foreground, sky and surrounding planting draw attention. If the building becomes difficult to read, simplify the scene and check the camera before spending more time on effects.
4. Review the output
Inspect your render at its intended delivery size. Look for stretched textures, floating vegetation and distracting highlights. Keep notes on the settings that improved the image and on the choices that did not help. The lesson uses Lumion Pro 12.5, so compare menu locations with your installed version instead of assuming every control is identical.
Practice with this Lumion exterior rendering tutorial
Keep a short record of the inputs, changes and result from your Lumion exterior rendering practice. Save the starting model and a separate working copy, then note the step at which your result differs from the demonstration. A clear comparison helps you decide what to repeat and makes a later question easier to explain. Repeat the exercise with one deliberate variation after the original example is understood.
When reviewing Lumion exterior rendering, compare the result with the purpose of the exercise rather than only its appearance in a screenshot. Check the project from another view, inspect the important geometry and identify which choices depend on your software version or project brief. Keep the useful decisions and revise the ones that do not support your own design. The video remains a visual learning reference, while your project requirements determine the final result.
Troubleshoot an exterior preview
If an exterior preview feels unconvincing, compare it with the model before adding more effects. Begin with a view in which the building is easy to read. Check whether the foreground occupies too much of the image, whether shadows hide the entrance and whether a reflective surface attracts attention away from the architecture. Adjust the camera or the major material first and keep the lighting unchanged during that comparison.
Next inspect the site context. Planting, ground textures and surrounding objects should support the building rather than conceal it. Check that repeated objects are not visibly identical in a distracting way and that their scale belongs to the scene. A simpler context can be easier to evaluate while you are learning. Add detail only when it improves the chosen view and the purpose of the presentation.
Finally compare two outputs side by side. Name the saved images after the variable you changed, such as camera or facade material. Keep the better version and record why it helps. This turns a rendering session into a repeatable test and gives you a clear starting point for the next design revision.
Resources for this Lumion exterior rendering tutorial
After watching this Lumion exterior rendering tutorial, open Lumion Rendering Tutorials. Then explore Exterior design projects for a related next step. Choose a resource that addresses the task you are practicing; you do not need to follow unrelated lessons simply to complete this exercise.
Lumion Rendering Tutorials
Read the companion guide and compare its resources with the operation shown in this video.
Open companion guide →Exterior design projects
Use this related collection to plan the next practical task for your own project.
Explore related resources →Exterior scene review
Review the exterior from the viewpoint you intend to present, then check a second angle that exposes the sides and rear of the building. Look for floating vegetation, repeated assets that form an obvious pattern, and surfaces whose scale does not match the building. Keep the main architectural idea clear instead of filling every empty area with objects. Save a draft image before adjusting the atmosphere so that you can compare the effect of the changes.
Check reflections and transparent surfaces against the scene, and review the image at its intended viewing size. If a detail is difficult to assess in a small preview, render a focused test before committing to the final output. Record which settings belong to the lesson version and which choices you adapted for your own exterior.
Lumion exterior rendering tutorial: common questions
Can I use a different Lumion version?
Use the scene-building principles as a reference and check the controls and features available in your own release. This lesson was recorded in Lumion Pro 12.5.
What should I do if the video does not play here?
Use the original YouTube link above to open the same video directly. Availability and any access requirements are controlled by the video owner. The embedded player retains its normal playback and full-screen controls.
How can I practice Lumion exterior rendering after watching?
Follow the four-step plan on this page, save your starting model and compare one small variation with the original result. Return to the relevant part of the video when a step needs another review.