Nice Tower · SketchUp tools and workflow guides
SketchUp Plugins & Modeling Extensions
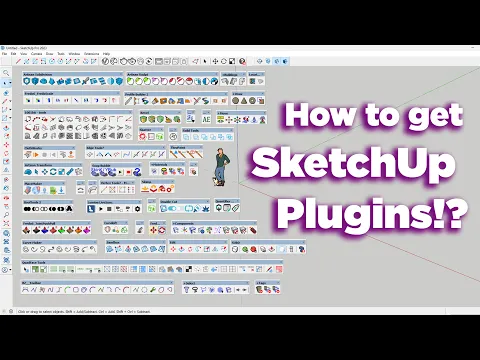
plugins can help you choose SketchUp extensions by modeling purpose rather than popularity. This page brings together the existing demonstrations and resource links, a practical test workflow and related Nice Tower lessons. Choose one recurring project need, check the relevant requirements and compare a small result before adding the tool to your everyday setup.
Table of Contents
Best SketchUp Plugins: Essential Extensions to Boost Your 3D Modeling Speed and Creativity
SketchUp plugins are powerful extensions designed to enhance the native capabilities of SketchUp and provide users with a more efficient, flexible, and professional workflow. Whether you are an architect, interior designer, 3D artist, landscape designer, or product modeler, plugins allow you to push the boundaries of what SketchUp can accomplish. These tools are developed by third-party creators who focus on solving common modeling challenges, automating repetitive tasks, improving accuracy, and enabling advanced features that SketchUp alone cannot deliver. By installing the right combination of plugins, professionals can dramatically increase their modeling precision, reduce working time, and produce higher-quality visualizations.
One of the main advantages of SketchUp plugins is that they give users the ability to customize the software according to their specific workflow needs. For example, architectural designers often rely on plugins like V-Ray, Enscape, Skatter, and Profile Builder to streamline complex tasks such as rendering, vegetation scattering, parametric modeling, and automatic profile generation. These extensions help transform a basic SketchUp model into a polished, photorealistic, and presentation-ready project within minutes. Instead of spending hours manually modeling details, plugins make it possible to automate these steps with a single click, freeing up valuable time for creativity and design development.
Another key benefit of SketchUp plugins is the improvement in accuracy and efficiency during the modeling process. Plugins such as CleanUp³, Solid Inspector, and Eneroth tools help ensure clean geometry, detect modeling errors, and optimize files for faster performance. For designers working on large-scale projects or highly detailed models, these tools are essential to maintaining a smooth experience inside SketchUp, preventing crashes, and preparing models for rendering, 3D printing, CNC cutting, or BIM workflows. Additionally, parametric and smart modeling plugins allow users to make instant edits and adjustments without having to rebuild complex geometry manually.
Plugins also play a major role in visualization and client presentation. Rendering engines such as V-Ray, Enscape, Lumion LiveSync, and D5 Render have transformed SketchUp into one of the most powerful tools for producing high-quality images, animations, and virtual walkthroughs. With real-time rendering and physically accurate lighting, designers can preview materials, shadows, reflections, and environments instantly, helping them make better design decisions and impress clients with professional visual output. These plugins bridge the gap between concept and reality by turning simple models into immersive 3D experiences.
In addition to architecture and visualization, specialized plugins support various industries such as woodworking, product design, engineering, and landscape architecture. Tools like CabinetSense, Artisan, Joint Push/Pull, and Curviloft enable the creation of complex organic shapes, smooth surfaces, cabinets, furniture pieces, and intricate details that would otherwise be difficult or impossible to model in SketchUp alone. Users can explore design variations rapidly and bring unique creative ideas to life with greater precision and control.
Overall, SketchUp plugins significantly expand the capabilities of the software and empower users to work smarter, faster, and more creatively. By integrating the right extensions into their workflow, designers can enhance their productivity, elevate their designs, and achieve professional-level results across a wide range of industries. Whether you are looking for better modeling tools, advanced rendering options, automation features, or specialized utilities, SketchUp’s vibrant plugin ecosystem offers endless opportunities to enhance your 3D modeling experience.
6 practical checks for SketchUp Plugins & Modeling Extensions
This hub connects free tools, paid extensions and installation guidance. Use geometry tools for creating or editing forms, organization tools for managing a model, and visualization tools for communicating it. Several extensions may overlap, so compare one clear task before expanding your setup. A focused collection is easier to maintain and teach.
1. Define a small test before installing
Use a design with repeated profiles, organic furniture and carefully prepared render views as a manageable starting point. Write down the change you need and the view or report that will demonstrate it. plugins should be assessed against that result, rather than the size of a feature list. Save a separate working copy so an experiment does not replace the model you depend on.
2. Prepare the model and selection
Confirm units, object scale and component organization before running a new operation. Name the objects that belong to the test and isolate them from unrelated geometry. Check the active editing context so the tool receives the intended selection. A well-prepared starting model makes it easier to identify whether an unexpected result comes from input geometry, settings or the operation itself.
3. Compare an initial result with the original
Start with restrained settings and inspect the output from more than one view. For this workflow, pay particular attention to a documented operation, supported versions and understandable output. Keep the original available for a side-by-side comparison. Look beyond the first successful operation: consider how a later design revision changes the object and whether ordinary editing still remains understandable.
4. Check a revision and a saved file
Change one relevant dimension or placement, inspect the update and save a test version. Reopen that file and check the model again before adopting the technique throughout a larger project. Confirm that names, materials and visibility remain clear to another person. Record the settings you used so the result can be reproduced instead of relying on a remembered sequence of clicks.
5. Review installation and license information
Use the developer information for plugins to confirm current editions, requirements and support. Check your exact SketchUp release and operating system. A trial, subscription and permanent license may have different conditions. Follow our RBZ installation guide for orientation, then follow the instructions specific to the chosen extension.
6. Apply the workflow to a real design
Once the small test is repeatable, use it on a limited part of your design and assess the time required for both modeling and cleanup. plugins is useful when it helps you choose SketchUp extensions by modeling purpose rather than popularity. Compare the complete task, including revisions, presentation and delivery. Expand the technique only after the result meets the practical requirements of your own project.
Questions before choosing plugins
What should I check before using this workflow?
Check a documented operation, supported versions and understandable output. Read the current developer guidance and use a test copy to compare the result. Software tools support a modeling process; the final dimensions, geometry and project information still need to match the design you intend to communicate.
Where can I learn the next step?
Explore our SketchUp project tutorials, compare modeling tools or choose a format from the live course collection. Use a relevant lesson to practice a complete project instead of collecting extensions without a clear purpose.
Practice a complete SketchUp project
Use these Nice Tower lessons to practice installation and project modeling. They are related learning examples; check the specific developer demonstrations above for the exact extension operation.