
Double-Cut video — Watch and Practice
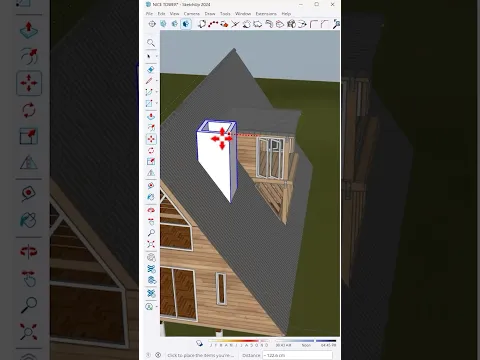
Watch the original Double-Cut demonstration and practice a small wall-opening test in SketchUp. This page helps you inspect the wall, cutting component and resulting opening without changing the original video. Follow the related extension guide for current information and compare the visible operation with your own geometry. A simple test is the clearest way to decide whether the workflow suits the type of wall and component in your project.
Double-Cut video: 4 steps to practice
1. Prepare a wall test
Create a small representative wall with a deliberate thickness and a clear front and back. Keep it separate from the rest of the project. Review its grouping and the position of the cutting component before testing. This makes it easier to distinguish a geometry problem from a setup or placement issue when the opening does not behave as expected.
2. Inspect the cutting component
Check the component’s orientation, origin and placement against the wall. Compare the setup with the example shown in the video and with the developer’s current instructions. Do not assume that any downloaded window or door is already prepared for the same operation. Keep a copy of the original component before changing its geometry or behavior.
3. Check both wall faces
Review the opening from the front, back and an oblique view so the wall thickness is visible. Inspect the edges and any remaining faces around the cut. A correct-looking front view alone does not establish that the full opening is clean. Test one opening carefully before repeating it across an architectural model.
4. Test a design revision
Move or revise the example as shown in the demonstration and inspect the resulting wall again. Save a version before making a major change. If the result differs, return to the simple test and check the input geometry and current plugin guidance. Use the approach in your project only after it behaves consistently with the component and wall structure you intend to use.
Practice with this Double-Cut video
Keep a short record of the inputs, changes and result from your Double-Cut practice. Save the starting model and a separate working copy, then note the step at which your result differs from the demonstration. A clear comparison helps you decide what to repeat and makes a later question easier to explain. Repeat the exercise with one deliberate variation after the original example is understood.
When reviewing Double-Cut, compare the result with the purpose of the exercise rather than only its appearance in a screenshot. Check the project from another view, inspect the important geometry and identify which choices depend on your software version or project brief. Keep the useful decisions and revise the ones that do not support your own design. The video remains a visual learning reference, while your project requirements determine the final result.
Review an opening through a wall
Keep a simple wall example with one opening as a reference. Inspect the front, back and thickness so you can see whether the intended cut has been made throughout the wall. Compare the result with the initial component placement and keep a copy of the source geometry. This makes an unexpected face or edge easier to diagnose.
When using another component, check its setup before testing it in the full building. Its origin, orientation and internal geometry may differ from the demonstration. Use the developer instructions to identify the required behavior and perform the operation on a saved test copy. An attractive window preview does not establish that the component is prepared for a particular cutting workflow.
After a successful test, check a representative revision such as a moved opening or a changed wall condition. Inspect the resulting geometry again and note what remains linked to the component. Keep the exercise separate from the main project until the behavior is clear. This gives you a practical way to compare an operation with the design change you intend to make.
Resources for this Double-Cut video
After watching this Double-Cut video, open Double-Cut for SketchUp. Then explore Door and window models for a related next step. Choose a resource that addresses the task you are practicing; you do not need to follow unrelated lessons simply to complete this exercise.
Double-Cut for SketchUp
Read the companion guide and compare its resources with the operation shown in this video.
Open companion guide →Door and window models
Use this related collection to plan the next practical task for your own project.
Explore related resources →Inspect both sides of an opening
Review a wall opening from both sides after placing or moving the cutting component. Check that the visible hole agrees with the component position and that the wall surfaces remain suitable for the next modeling task. Keep an untouched wall and component in a separate reference group while testing. Use a small example with a clear wall thickness before introducing more complicated geometry.
When the result differs from the demonstration, inspect the component setup and the wall structure rather than repeatedly running the operation. Compare the behavior of a single opening with a repeated arrangement before distributing copies. Check materials and edges around the cut after revisions. Save the tested component so that the setup can be reused consistently, and consult the extension information when applying the method to another SketchUp version.
Double-Cut video: common questions
Will any window component cut a wall correctly?
Check the component setup and wall geometry against the extension documentation. A downloaded object may need preparation before it can be used in the same cutting workflow.
What should I do if the video does not play here?
Use the original YouTube link above to open the same video directly. Availability and any access requirements are controlled by the video owner. The embedded player retains its normal playback and full-screen controls.
How can I practice Double-Cut after watching?
Follow the four-step plan on this page, save your starting model and compare one small variation with the original result. Return to the relevant part of the video when a step needs another review.