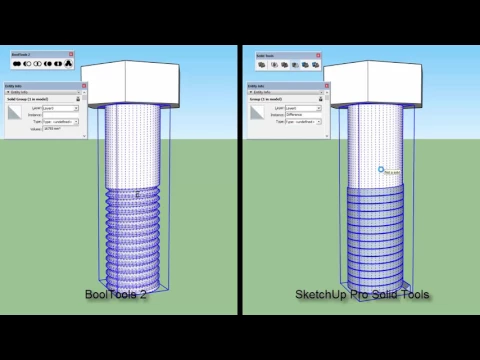
BoolTools 2 video — Watch and Practice
Watch the comparison between BoolTools 2 and SketchUp Pro Solid Tools, then test a simple operation on copies of your own geometry. This page helps you compare inputs, results and cleanup rather than choosing a tool from a preview alone. Use the original demonstration to see the operation and the related guide to review the extension information before deciding where it fits in your modeling workflow.
BoolTools 2 video: 4 steps to practice
1. Prepare simple solids
Start with a small test containing two clearly separated solid objects. Inspect their grouping and confirm that the geometry is suitable for the operation you want to compare. Keep an untouched copy of each input. A complicated project can hide the reason an operation fails, while a simple example makes the relationship between the objects easier to understand.
2. Compare equivalent operations
Use the same input shapes when comparing the extension with the tools available in your SketchUp installation. Observe which object is retained, removed or modified. Inspect the resulting faces and edges from more than one direction. Similar-looking previews can conceal a different structure, so assess the actual model rather than only the screen view.
3. Inspect the result
Check for unwanted internal faces, stray edges and surfaces that no longer belong to a closed volume. Review how materials and grouping have been affected. If the result will be reused as a component, test its behavior before making repeated instances. Keep notes about the input conditions that produced a clean result and those that required additional preparation.
4. Apply the comparison carefully
Move from the simple test to a representative part of your project. Use a saved copy and compare the result with the design you intended to create. Tool availability and behavior can depend on version and license, so check the linked documentation. Choose the approach that produces a reliable result for the task instead of assuming one tool is always preferable.
Practice with this BoolTools 2 video
Keep a short record of the inputs, changes and result from your BoolTools 2 practice. Save the starting model and a separate working copy, then note the step at which your result differs from the demonstration. A clear comparison helps you decide what to repeat and makes a later question easier to explain. Repeat the exercise with one deliberate variation after the original example is understood.
When reviewing BoolTools 2, compare the result with the purpose of the exercise rather than only its appearance in a screenshot. Check the project from another view, inspect the important geometry and identify which choices depend on your software version or project brief. Keep the useful decisions and revise the ones that do not support your own design. The video remains a visual learning reference, while your project requirements determine the final result.
Assess a solid operation
Use a comparison model that contains both a straightforward case and a transition similar to your project. Check each input before running the operation and save copies. This gives you a baseline for deciding whether an unexpected result comes from the tool, the geometry or the relationship between the two objects. Keep the inputs visible in a separate reference group.
Review the output as geometry rather than just a silhouette. A subtraction or join can create small edges or internal faces that are not obvious from the main camera. Inspect the affected area from another direction and compare the retained volume with the intended design. Check how grouping and materials have changed as well as the visible outline.
Write down the operation, inputs and result for each approach. The most useful choice is the one that works reliably with the shapes and revisions in your workflow. Do not infer a general winner from a single example. Repeat the test with a representative detail and use the linked developer information to confirm the available functions and requirements.
Resources for this BoolTools 2 video
After watching this BoolTools 2 video, open BoolTools 2 for SketchUp. Then explore SketchUp tool guides for a related next step. Choose a resource that addresses the task you are practicing; you do not need to follow unrelated lessons simply to complete this exercise.
BoolTools 2 for SketchUp
Read the companion guide and compare its resources with the operation shown in this video.
Open companion guide →SketchUp tool guides
Use this related collection to plan the next practical task for your own project.
Explore related resources →Compare retained geometry
After testing a solid operation, inspect the objects that remain in the model rather than only the visible cut. Check whether the output still has the grouping and material structure you need for the next task. Keep the untouched input shapes in a reference group so that you can repeat the comparison without rebuilding them. Test both a simple overlap and an overlap similar to the final design. Small faces or narrow intersections may behave differently from a large uncomplicated block.
Record which input changed and which input was preserved for each operation. Rotate the result and inspect hidden faces before assigning it to a reusable component. When a result is difficult to understand, return to the simpler example and alter one condition at a time. This makes the comparison useful for your own modeling decisions.
BoolTools 2 video: common questions
Should I test on my main model?
Begin with simple copies of the input shapes in a separate test file. Once the result is clear, repeat the operation on a saved copy of the project.
What should I do if the video does not play here?
Use the original YouTube link above to open the same video directly. Availability and any access requirements are controlled by the video owner. The embedded player retains its normal playback and full-screen controls.
How can I practice BoolTools 2 after watching?
Follow the four-step plan on this page, save your starting model and compare one small variation with the original result. Return to the relevant part of the video when a step needs another review.