Explore Image-to-3D Modeling with Hi3D V3.0
Hi3D AI offers image-to-3D generation. Use a reference image to explore a 3D starting point, then inspect and prepare the result for your intended use. Results and preparation time vary by input and project.
Campaign terms: bonus credits for the first 200 sign-ups through the Nice Tower link. Remaining availability is not verified here; confirm the offer on Hi3D before purchasing.
Try Hi3D V3.0Promo Code: NICETOWERS10

Table of Contents
Manual Modeling Takes Time. Hi3D Gives You Another Way.
Recreating complex furniture, decorative objects, sculptures, characters and organic geometry can require significant modeling time. Hi3D AI offers another way to build a useful starting point from a visual reference.
Generate, inspect and refine. AI output still needs your judgment: check proportions, geometry and details before bringing a model into the next stage of your design or visualization work.
From Reference to 3D: Three Practical Steps
1 — Upload Your Reference
Start from an image, concept or visual reference. Choose a clear view of the object you want to explore in 3D.
2 — Generate with Hi3D V3.0
Use Hi3D V3.0 to generate the 3D model and inspect the result. Compare the generated shape with your reference.
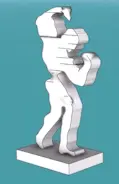
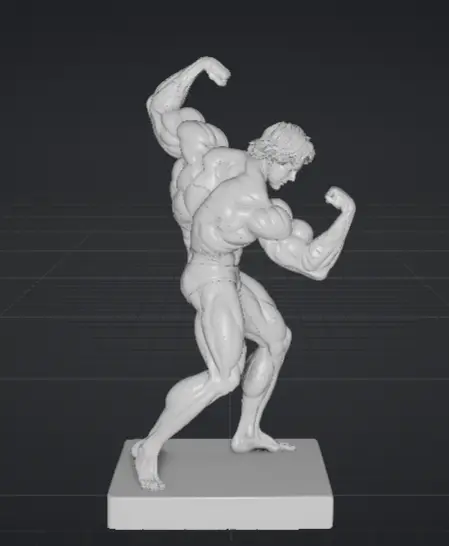
These images illustrate the workflow stages; they do not document a verified before-and-after test. Review your own output before moving on.
3 — Preview & Download
Review geometry and details, then download the model for the next stage of the workflow. Inspect scale and suitability in your chosen 3D software.
Explore the Hi3D AI Creation Workflow
Image to 3D
Generate a 3D model from an image, then review the shape and detail.
Hi3D V3.0
Hi3D lists V3.0 among its available models. Check access and credit requirements in your account.
Complex Object Starting Points
Evaluate generated geometry as a possible starting point. Any time saving depends on the object and required cleanup.
Review the Output
Inspect generated geometry and details before downloading.
Creative Workflow
Explore a workflow for architects, SketchUp users, visualization artists, designers and 3D creators. Check your software’s import requirements before use.

Nice Tower × Hi3D Special Offer
The campaign offer includes bonus credits for the first 200 sign-ups through the Nice Tower campaign link. Remaining eligibility must be confirmed with Hi3D.
Promo Code: NICETOWERS10
Use the campaign link below and review the current plan and offer details on Hi3D before subscribing.
Claim the Hi3D OfferAffiliate disclosure: Nice Tower may earn a commission if you purchase through this campaign link.
Get More from Your Hi3D AI Workflow
The steps below are general workflow guidance, not a measured product benchmark. Hi3D documents image-to-3D generation and V3.0 on its official website. Check current plan limits, download options and usage terms there. Upload only references you have permission to use; commercial-use rights depend on the plan and applicable terms.
Choose a useful reference
Start with an image where the object’s silhouette is easy to see. Look for clear edges, readable proportions and a view that explains the shape. A simple background can make the reference easier to assess. Keep your intended use in mind: a decorative object seen from a distance needs different scrutiny from a close-up centerpiece.
Inspect before you import
Compare the Hi3D AI result with the reference instead of relying on a thumbnail. Check both the overall shape and the details that matter for your intended view. Keep a short list of required corrections, and work through it before adding the object to a finished design. This makes your review consistent across different assets and helps you decide when a generated model is useful enough to keep. Examine thin parts, small details and areas hidden in the source image. Rotate the preview and decide what needs correction. Save a working copy before making edits, so you can compare your changes with the generated starting point.
Prepare the next stage
Check the available download options in Hi3D AI and confirm that your chosen software can import the selected file. Review scale, orientation and materials after importing. Keep the new asset separate from the rest of your scene while you test it, then organize it before placing additional copies.
Can I use this in a SketchUp workflow?
Hi3D AI can provide a starting point for a wider 3D workflow. Direct compatibility depends on the format available for your download and the import options in your SketchUp version. Verify those options before subscribing. For scene organization and practical lessons, explore our SketchUp tutorials and AI and rendering resources.
Does every generated model arrive ready to use?
No. Treat each Hi3D AI model as a result to evaluate. Some objects may need proportion changes, geometry cleanup or material adjustments. Test a small asset first and decide whether the output meets your project’s needs.
How do I access the Nice Tower offer?
Use one of the campaign buttons on this page and the promo code NICETOWERS10. The Nice Tower campaign offer is 50% off the annual plan plus 200 bonus credits for the first 200 campaign sign-ups. Confirm the displayed price, eligibility and current terms on Hi3D before completing a purchase.
Before Hi3D AI generation: define what the model needs to do
Decide where the object will appear before generating it. A background sculpture, a close-up product view and a design-study object have different requirements. Write down the approximate size, intended camera distance and important features. That short brief gives you a practical basis for accepting or rejecting a generated result.
Look closely at your reference. Which parts are actually visible, and which parts would have to be inferred? A single image does not explain every side of an object. Treat hidden surfaces as areas to inspect rather than assuming they will match your intention. If a specific edge, opening or attachment matters, make it part of your review checklist.
Keep the reference beside the preview and compare the overall silhouette first. Then examine the main proportions and smaller details. This order helps you spot a major shape mismatch before spending time on fine surface features. Save notes about what worked, what did not and what you would change in the next attempt. The aim is a repeatable evaluation process, not simply a visually impressive first thumbnail.
Review Hi3D AI geometry before adding it to a scene
Rotate the model and inspect it from several angles. Check the base, rear surfaces, narrow connections and any openings visible in the reference. These areas may be easy to overlook when you only judge the front view. Use the geometry preview as a review aid and inspect the downloaded file in your own software before relying on it.
Separate shape quality from scene performance. A model can look convincing in a small preview yet be difficult to edit or unnecessarily heavy for repeated use. Open it in an isolated test file, examine its structure with the tools available in your software and decide whether cleanup is needed. Keep an untouched copy so you can return to the original output if an edit does not help.
Review the object at the camera distance you actually intend to use. Small defects that are invisible in a background asset may matter in a close-up. Conversely, an object intended for a distant view may not need the same detail as the centerpiece of a presentation. Use that context to decide which corrections are worth your time before integrating the model into a larger project.
Prepare Hi3D AI assets for a SketchUp scene
Import the downloaded asset into a separate test scene when your chosen file format and software support it. Compare the object with a known-size item or a dimension you control. Do not assume the imported scale matches your design. Check the overall height, width and depth and adjust them deliberately before placing the object in a finished scene.
Review the orientation and position of the model as well. An asset that arrives tilted, far from the origin or facing the wrong direction can make later placement awkward. Correct those issues in the test scene, then organize the geometry into an appropriate group or component for your workflow. Give it a descriptive name so it remains easy to identify later.
Test one instance before creating multiple copies. Move it, inspect the important views and check that it behaves as expected. If you plan to repeat the object, review the effect on navigation and editing responsiveness as you add instances. Save the cleaned asset separately from your working project. That creates a reusable starting point and avoids repeating the same preparation work every time you use the model.
Review Hi3D AI materials and the final presentation
Inspect the model under the lighting and camera view you plan to use. A surface that looks attractive in a preview may read differently in your own scene. Compare the important colors, visible material boundaries and surface detail with the reference. Decide which features you need to retain and which you can simplify for the intended presentation.
Look for obvious mismatches on the most visible areas first. Check whether decorative details, transitions between surfaces and the object’s base look coherent from the final camera position. If your workflow includes rendering, make a small test image before investing in a high-resolution output. This gives you a chance to assess the object in context while the scene is still easy to change.
Keep your evaluation practical. The goal is not to make every surface identical to the source image at every possible angle. The goal is to decide whether the asset supports the design view you need and what adjustments remain. Record material edits alongside geometry changes so you can reproduce them later. A short, consistent review process helps you make better use of an AI-generated starting point.
Test your Hi3D AI download and keep the workflow reproducible
Before committing to a larger workflow, check the download options currently available in your Hi3D account. Match the format you select to the import tools in your target software. If an intermediate conversion is needed, inspect the converted result as carefully as the original download. File conversion can change how an object is organized or how its materials appear.
Keep the source reference, original download and edited working file in a clearly named project folder. Use filenames that distinguish the untouched output from your prepared asset. This makes it easier to compare versions, identify a successful result and recover from an editing mistake. Add a short note with the important changes you made after importing.
For a repeatable workflow, evaluate a small object first. Complete the full sequence: reference, generation, preview, download, import and scene review. Note where extra work was required. Once you understand that sequence, you can judge whether the same approach suits a more complex object. Hi3D AI is most useful when you evaluate the whole process rather than measuring success only by the initial generated preview.
Understand the Hi3D AI campaign before subscribing
The Nice Tower campaign on this page uses promo code NICETOWERS10. The Nice Tower campaign offer is 50% off the Hi3D annual plan, with 200 bonus credits available to the first 200 users who sign up through the campaign link. Use the campaign buttons rather than a generic Hi3D address so that the supplied campaign parameters remain attached to your visit.
Review the offer displayed by Hi3D before completing a subscription. Confirm that you selected the annual plan and that the checkout information reflects the promotion you intend to use. The first-200 condition applies to the bonus credits; this page does not provide a live count of remaining eligible sign-ups. Remaining bonus availability is not verified on this page.
Check the current plan details and any terms shown by Hi3D so you understand what you are choosing. If the displayed offer differs from this page, resolve that difference before purchasing. Nice Tower’s role here is to explain the workflow and provide the campaign link. Your final decision should be based on the plan, pricing and conditions presented by Hi3D at the time you subscribe.
Decide when to use AI and when to model manually
Start with the requirement, not the tool. Hi3D AI is worth evaluating when you have a visual reference and need a starting point for a complex object. A simple shape with precise, known dimensions may be easier to build directly. Compare the preparation and cleanup needed for both approaches instead of assuming that generation is always the shortest route.
For a decorative asset, judge the silhouette and the features visible in your presentation. For an object that must fit another piece of geometry, examine the contact surfaces and required dimensions much more carefully. These are different tasks. An attractive generated object is not evidence that it meets a precise design constraint.
Set a practical stopping point for your evaluation. If the first result does not meet the brief, note the specific problem before trying again. If several attempts still require extensive changes, consider rebuilding the important parts manually or using another suitable reference. Keep the choice tied to the result you need.
A useful comparison is to complete one small example from start to finish. Record the time spent selecting the reference, reviewing output and preparing the imported model. That gives you a realistic basis for deciding where this workflow belongs in your own process. The value comes from a usable asset and a repeatable method, rather than from generation alone.
Compare iterations without losing your best result
Keep successful outputs while you evaluate alternatives. Give each attempt a clear filename and save the reference used for it. If you change several things at once, it becomes harder to understand why the result improved or became less useful. A short note beside each version can be more helpful than a folder full of unnamed downloads.
Use the same review order each time: overall shape, major proportions, thin or complex features and suitability for the intended camera view. Compare models under similar conditions. A different preview angle or background can make one version seem better even when it does not solve the problem you identified.
When you make an edit after downloading, save it as a separate working version. Preserve the original output and compare the two before committing the asset to your scene. This is particularly useful when a cleanup operation changes an important part of the silhouette. Keeping versions makes it easier to undo a decision without repeating generation.
For Hi3D AI experiments, define what you are testing before the next attempt. You might be evaluating a clearer reference, a more suitable object or a different preparation approach. Record what changed and whether it helped. A compact comparison process supports better decisions and gives you useful examples to return to when preparing future models.
Keep a prepared asset library you can actually reuse
A downloaded model becomes more useful when it is documented and organized. Keep the original file alongside your prepared copy. Add a small preview and a brief description of the object, the reference and the changes you made. This helps you identify the right version later without reopening every file.
Record practical information that affects reuse: the scale you checked, the orientation you corrected, the software used for preparation and any remaining issues. Avoid calling an asset finished if it has only been inspected in a thumbnail. A simple note such as “reviewed for distant views; close-up detail still needs checking” communicates more than an ambiguous final filename.
Before using a prepared asset in another scene, check that the new context suits it. A model reviewed for one camera position may reveal different details from another angle. Recheck size and materials in the new scene rather than assuming that a previous result transfers unchanged. Keep those checks brief and repeatable.
If you share a working scene with collaborators, use clear names and explain which version they should use. Include the relevant preparation notes so that someone else can continue the work without guessing. An organized library makes your Hi3D AI experiments easier to revisit and helps turn individual generated outputs into a practical resource for future learning and design studies.
Ready to Turn Your Reference Into 3D?
Explore Hi3D V3.0 through the Nice Tower campaign. Confirm that the promotion is applied and review the current terms before purchasing.
Try Hi3D NowPromo Code: NICETOWERS10