
BIM Bundle video demonstration — Watch and Practice
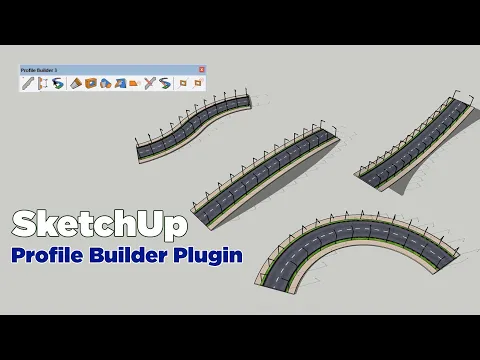
Watch the original Profile Builder demonstration and use this page to plan a small repeated-profile exercise in SketchUp. The video focuses on a plugin workflow, while the linked BIM Bundle guide provides related resource information. Check the current developer requirements for your version before following a setup step. Preserve a simple test model so you can compare the profile, path and resulting geometry clearly.
BIM Bundle video demonstration: 4 steps to practice
1. Choose a profile and path
Begin with an uncomplicated cross-section and a short path. Check the scale and orientation of both before generating geometry. A small test makes it easier to see how the profile relates to the path and where a transition needs attention. Keep the original reference shapes available so you can compare them with the resulting model.
2. Inspect corners and transitions
Review changes in direction from several camera angles. Look for unwanted intersections, gaps or unexpected orientation changes. A result that looks correct along a straight segment may need attention at a corner. Test a representative transition before applying the approach to a longer architectural element or a large collection of repeated parts.
3. Keep the model organized
Separate the generated element from nearby project geometry and use clear names where they help identification. Check the component or group structure before making copies. If you edit the source profile or path, compare the result with the previous version. A controlled test is easier to revise than a detailed project whose parts have become difficult to distinguish.
4. Extend the exercise
After the simple example works, apply the approach to a relevant architectural detail in a saved project copy. Review dimensions, joins and material assignments at the final viewing distance. The current extension documentation is the right source for available functions and compatibility. Treat the video as a demonstration and adapt the operation to the geometry and version you are actually using.
Practice with this BIM Bundle video demonstration
Keep a short record of the inputs, changes and result from your Profile Builder practice. Save the starting model and a separate working copy, then note the step at which your result differs from the demonstration. A clear comparison helps you decide what to repeat and makes a later question easier to explain. Repeat the exercise with one deliberate variation after the original example is understood.
When reviewing Profile Builder, compare the result with the purpose of the exercise rather than only its appearance in a screenshot. Check the project from another view, inspect the important geometry and identify which choices depend on your software version or project brief. Keep the useful decisions and revise the ones that do not support your own design. The video remains a visual learning reference, while your project requirements determine the final result.
Test a repeated profile deliberately
Use a short path that includes the kind of corner or change of direction needed in your project. Inspect the source profile and compare it with the generated element. If the result is unexpected, simplify the path and repeat the test before revising the whole project. Keep the original shapes so you can see exactly what changed between attempts.
Compare the model at both a close and a normal presentation distance. Small junction problems may become visible only in a close view, while an inappropriate profile scale may be clearer in the wider composition. Check the dimensions and material direction against the architectural element you are trying to create. The useful result depends on the project purpose, not only on a successful tool operation.
Save a clearly named example once the test works. Record the profile, path and relevant version information. Reuse that example as a reference for later details, but inspect each new transition rather than assuming all geometry behaves the same way. The companion resource and current developer guidance help you understand which functions belong to the installed extension.
Resources for this BIM Bundle video demonstration
After watching this BIM Bundle video demonstration, open BIM Bundle for SketchUp. Then explore Professional SketchUp plugins for a related next step. Choose a resource that addresses the task you are practicing; you do not need to follow unrelated lessons simply to complete this exercise.
BIM Bundle for SketchUp
Read the companion guide and compare its resources with the operation shown in this video.
Open companion guide →Professional SketchUp plugins
Use this related collection to plan the next practical task for your own project.
Explore related resources →Understand the demonstrated tool
Treat this demonstration as a focused example of Profile Builder rather than a complete explanation of every tool in the BIM Bundle. Identify the profile and path used in the example, then inspect how the result changes when either input is revised. Keep a copy of the path before creating more complex geometry. Check corners, transitions and the orientation of the profile from more than one camera view.
Use a simple test to establish the expected behavior before applying it to a larger project. Review the companion page for the bundle context and consult the relevant tool information for specific requirements. Save the tested example with a short note about the operation you practiced. This helps you choose a relevant next lesson without assuming that one video covers all of the bundle’s modeling functions.
BIM Bundle video demonstration: common questions
Is this video a demonstration of every BIM Bundle tool?
This video demonstrates Profile Builder. Use the BIM Bundle guide and developer documentation to review the other tools and their specific functions.
What should I do if the video does not play here?
Use the original YouTube link above to open the same video directly. Availability and any access requirements are controlled by the video owner. The embedded player retains its normal playback and full-screen controls.
How can I practice Profile Builder after watching?
Follow the four-step plan on this page, save your starting model and compare one small variation with the original result. Return to the relevant part of the video when a step needs another review.